
To create these folders:
- Right-click your “Inbox” folder and select “New Folder”.

- Title the first folder “To Do”.
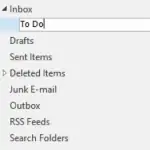
- Click the arrow next to the Inbox folder to view your new To-Do folder.
- Right-click the To-Do folder, select new folder, and name this folder “Some Day.”
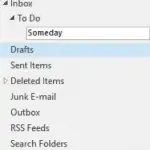
- Repeat to create a “Follow Up” subfolder under the To-Do folder
Tip: If you’re using folders already, use numbers to bring them to the top of your list
Some emails do not require an immediate response, but they do need to be handled before the time you have scheduled to review items in your To-Do folder.
These items can still be moved to your To-Do folder, so they are not clogging your inbox, but you’ll want to make sure that you have a reminder to take care of them before a deadline.
Create a reminder by adding these emails to Outlook’s task list:
- Select the email and select the flag Icon from the ribbon.
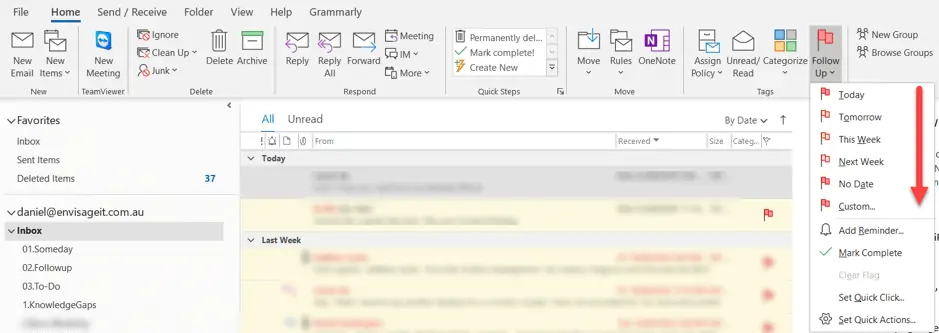
- You can even add custom due dates by setting a flag with a date and time. If you set this reminder, the task will pop up like a meeting reminder at the specified time.
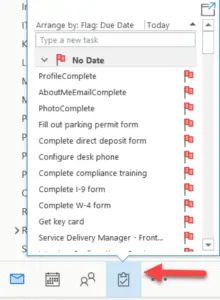
- You can easily view your To Do list by clicking on the task list icon in the bottom left had corner of Outlook.
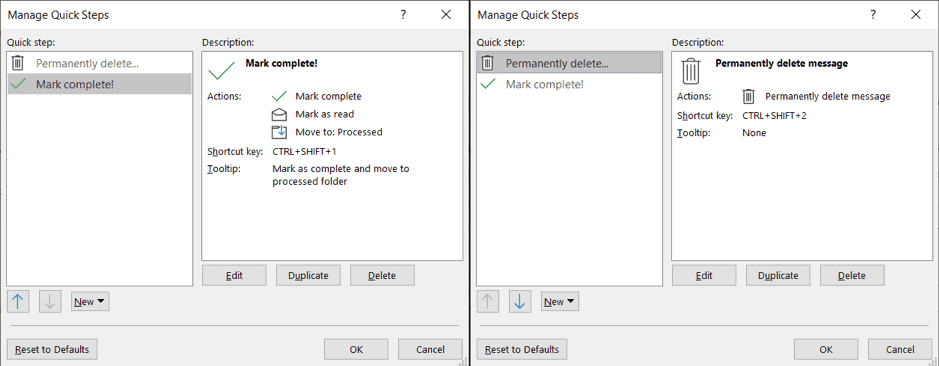
Once the task is complete, I like to mark them as “complete” and move them to a processed folder.
Outlook has a “mark complete” function, but I prefer to use the Quick Steps rule I created. Or if the email is complete junk, I permanently remove it from my inbox.
Taking time off is wonderful until you open your email after returning to work. If you work in an email-heavy company, you may have received hundreds of emails while you were out of the office, and now you are faced with the difficult task of sorting through each one.
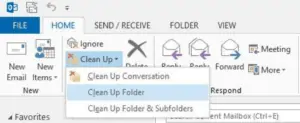
With Outlook’s “Clean-Up” function (introduced in Outlook 2010), you can drastically reduce the number of emails you have to deal with in just a few clicks – whether you’re coming back from holidays or you just have too many emails piled up.
The Clean-Up function removes all email replies that are duplicated in a later thread, allowing you to read a single thread instead of dozens of individual emails.
To clean up your inbox quickly:
- While viewing your inbox, click the “Clean Up” button and select “Clean Up Folder.”
- Click the “Clean Up Folder” button in the pop-up to confirm the action
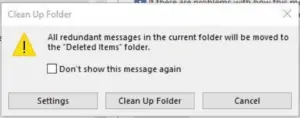
Outlook will automatically remove all duplicate emails, leaving you with significantly fewer emails to sort through.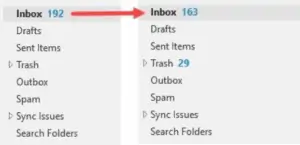
In this example, the Clean-Up tool removed 29 duplicate emails from the inbox. If needed, those emails can be accessed in the trash folder.
The Clean-Up function can be a little disconcerting to use initially. What if it deletes something important like a reply that contained an attachment that was removed in a later thread?
Rest assured, the tool is sophisticated and will not delete any emails with attachments or text that are not exactly duplicated in later threads, and you can always review deleted items in the trash folder if needed.
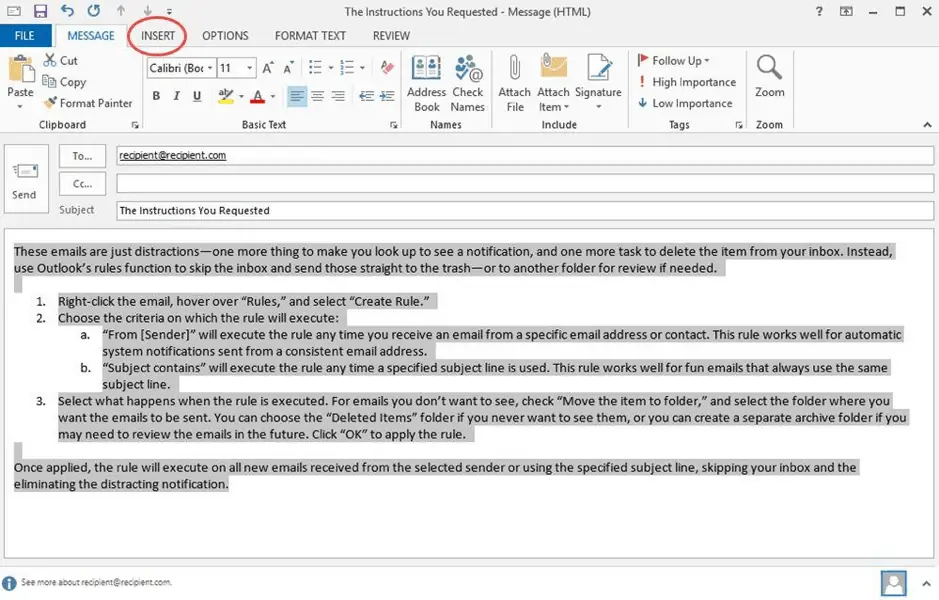
These emails keep you from focusing on your important work so you can use Outlook’s rules function to skip the inbox and send those emails straight to the trash – or to another folder for review.
You can also use Outlook rules to automatically sort incoming emails to the appropriate folder, such as always sending emails that are from your boss with a certain subject line to the To-Do folder and emails from a newsletter you regularly read to the Some Day folder.
To achieve this, you will need to:
- Right-click the email, hover over “Rules,” and select “Create Rule”
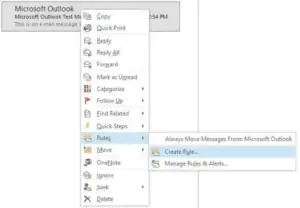
- Choose the criteria for the rule:
* “From (sender)” will execute the rule any time you receive an email from a specific email address or contact.
* “Subject contains” will execute the rule any time a specified subject line is used.
- Select what happens when the rule runs:
* To sort emails out of your inbox and into the appropriate folder, check “Move the item to folder,” and select the folder where you want the emails to be sent.
* You can choose the “Deleted Items” folder if you never want to see them, or you can create a separate archive folder if you may need to review the emails in the future.
Click “OK” to apply the rule.
If you want to prevent getting future emails on a specific thread, instead of creating a rule, you can just use Outlook’s ignore function. Right-click the email, select “Ignore,” and confirm the action.
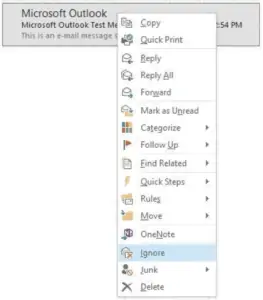
“Ignore” automatically sends future replies to that thread to your “Deleted Items” folder so you do not receive them in your inbox.
If you spend a lot of time typing the same answers to questions you get repeatedly, create Quick Parts to insert that text into email replies in just a few clicks.
That way, there will be no need to keep typing the same thing repeatedly or having to find an old response to copy and paste.
When you have finished typing a response that you expect to need to send again, follow the steps below to save the text as a Quick Part:
Highlight the text you want to save in the email, and click the “Insert” tab.
Within the “Insert” menu, click “Quick Parts,” and select “Save Selection to Quick Part Gallery”.
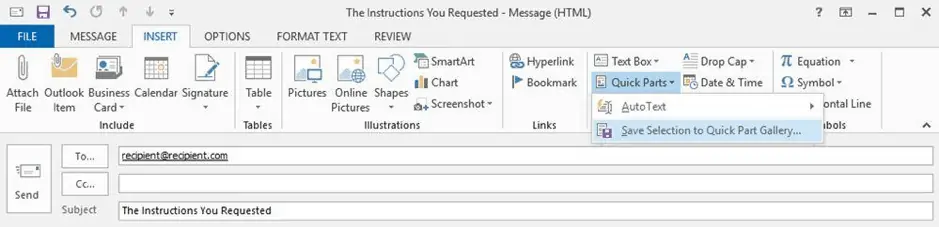
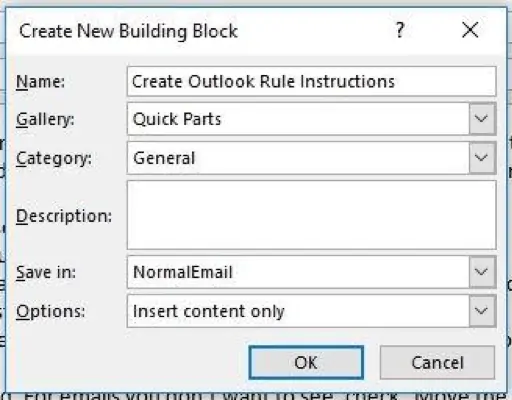
Give your new Quick Part a descriptive name and click “OK.”
With this Quick Part saved, you can now add that text to any email with just a couple clicks.
With your cursor in the body section of the email, click the “Insert” tab.
Click “Quick Parts,” and then select the Quick Part you want to insert.
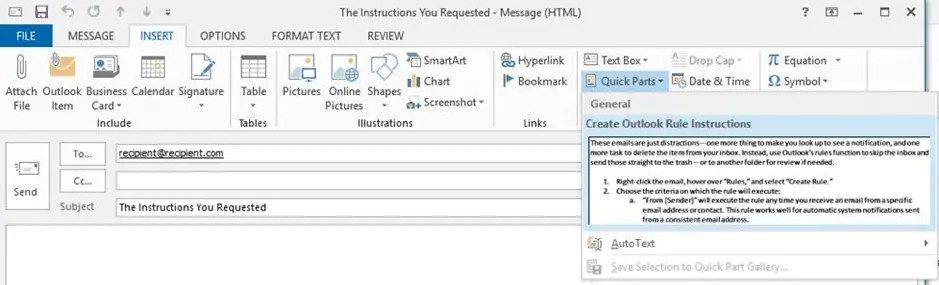
The prewritten text will automatically appear in the body of your email, and you can edit and customise it as needed for your new response.
If you have had success with the previous Outlook tips and are interested in getting into more advanced email management, it is time to take a look at Quick Steps, which allow you to automatically perform long strings of actions based on a trigger.
For example, say at the end of the month you receive a series of invoices from vendors or contractors. Your normal process is to review the invoices, forward the invoices to your accountant, and create a reminder to follow up with the accountant a week later to make sure the invoices were paid.
Quick Steps can take care of the last two steps for you with fewer clicks than if you performed the tasks manually:
Click the “Create New” button in the Quick Steps section of the Home ribbon.

Give the new Quick Step a descriptive name and select the first action: “Forward.”

Type your accountant’s email address into the “To” field.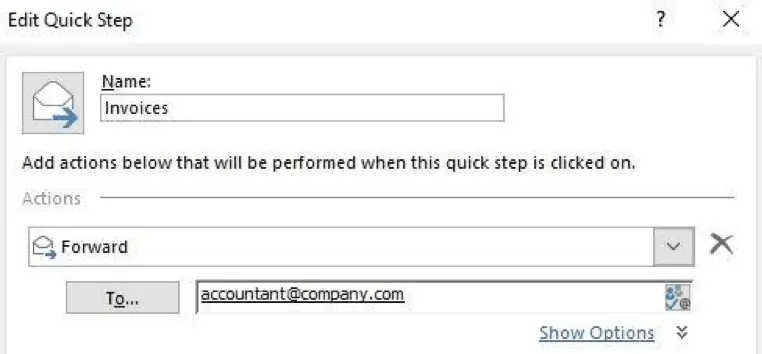
Click the “Add Action” button to select the second action: “Create a task with attachment.”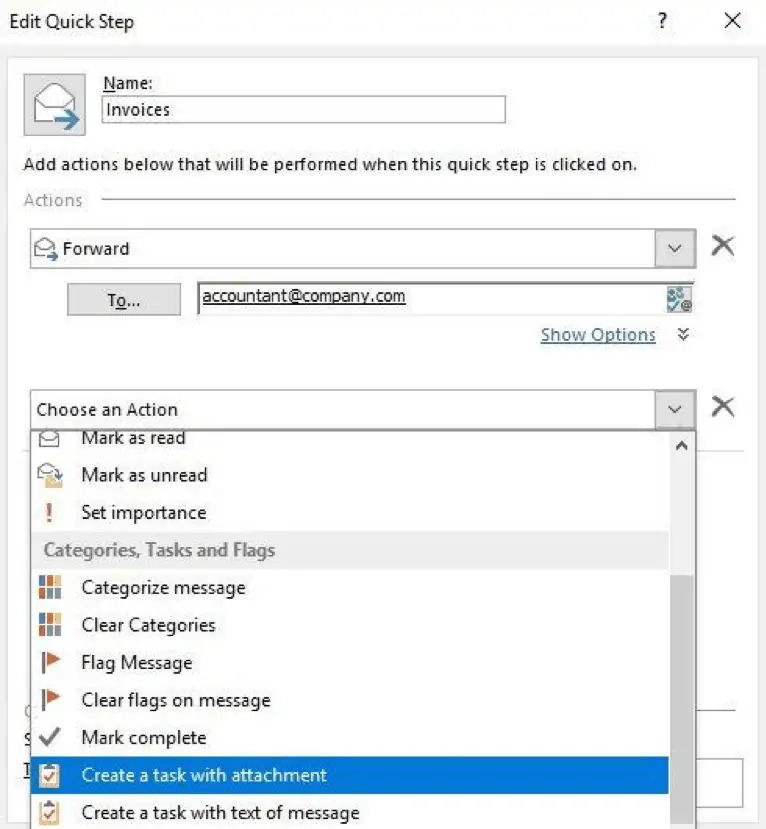
Click “Finish” to create the Quick Step.
After you review an invoice, you can now execute the Quick Step to forward the email and create a reminder task.
Select an email containing an invoice and click the appropriate Quick Step in the Home ribbon.

The email forward and task windows will open automatically. Click “Send” to forward the email, and set a due date and reminder for the task before saving, if you’d like.
There are many ways to use Quick Steps to speed up email processing. Spend some time thinking about the repetitive actions you take on emails, and set up Quick Steps to make managing your emails so much quicker and almost painless.
So there you have it, six easy steps to handing large volumes of emails in Outlook.
If you would like more information on best use of your Outlook email or any advice on any IT matters, contact the Envisage Technology team on 07 31121960.